Fuwari静态博客搭建教程
Fuwari 是一个静态博客框架,配合 Cloudflare Pages 可以快速搭建一个轻量、安全且易维护的个人博客
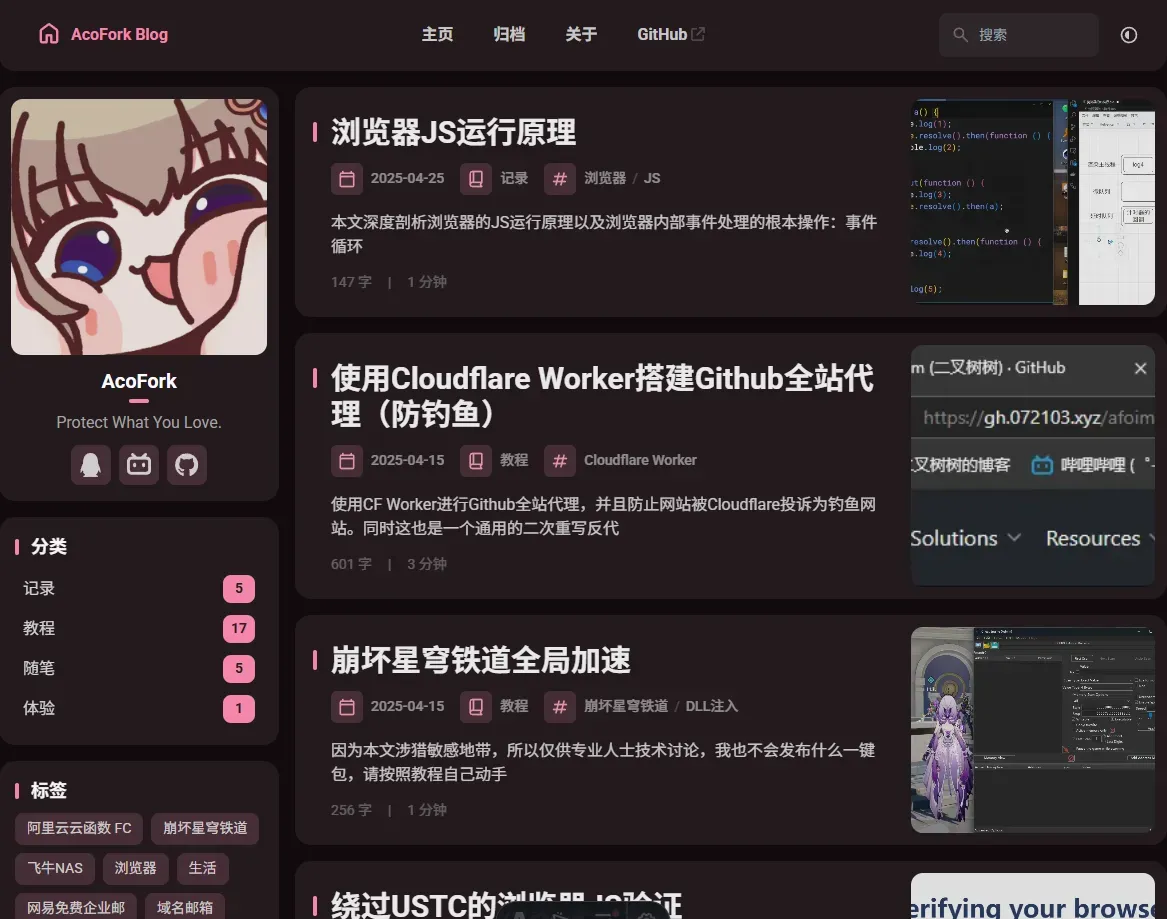
你需要准备的东西
-
一点基础的折腾能力。遇到问题先自己排查,实在解决不了再搜索或借助 AI,这样搭建过程会顺利很多。
-
Git - Downloads (git-scm.com):用于管理本地代码并与 GitHub 仓库同步。如果你更习惯图形界面,也可以尝试 GitHub Desktop | Simple collaboration from your desktop。
-
Node.js — Run JavaScript Everywhere (nodejs.org):Fuwari 基于 Node.js,因此需要先安装它。
-
一个 GitHub 账号:用于创建仓库并托管 Fuwari 项目文件。
-
一个 Cloudflare 账号:用于创建 Pages 项目并绑定域名。
-
黑曜石(Obsidian):这是一个可视化 Markdown 编辑器。由于 Fuwari 的文章和页面都以 Markdown 文件保存,准备一个顺手的编辑器会方便很多。
-
需要会一些基础的 Markdown 语法。如果暂时不熟悉,可以先看这个教程:Markdown 基本语法 | Markdown 官方教程。
流程图
本地部署Fuwari,编写文章 -> 推送更改到远程Github仓库 -> Cloudflare Pages检测到仓库更新自动构建新的网站静态文件 -> 网站成功更改
让我们开始吧
首先,在本地部署 Fuwari
-
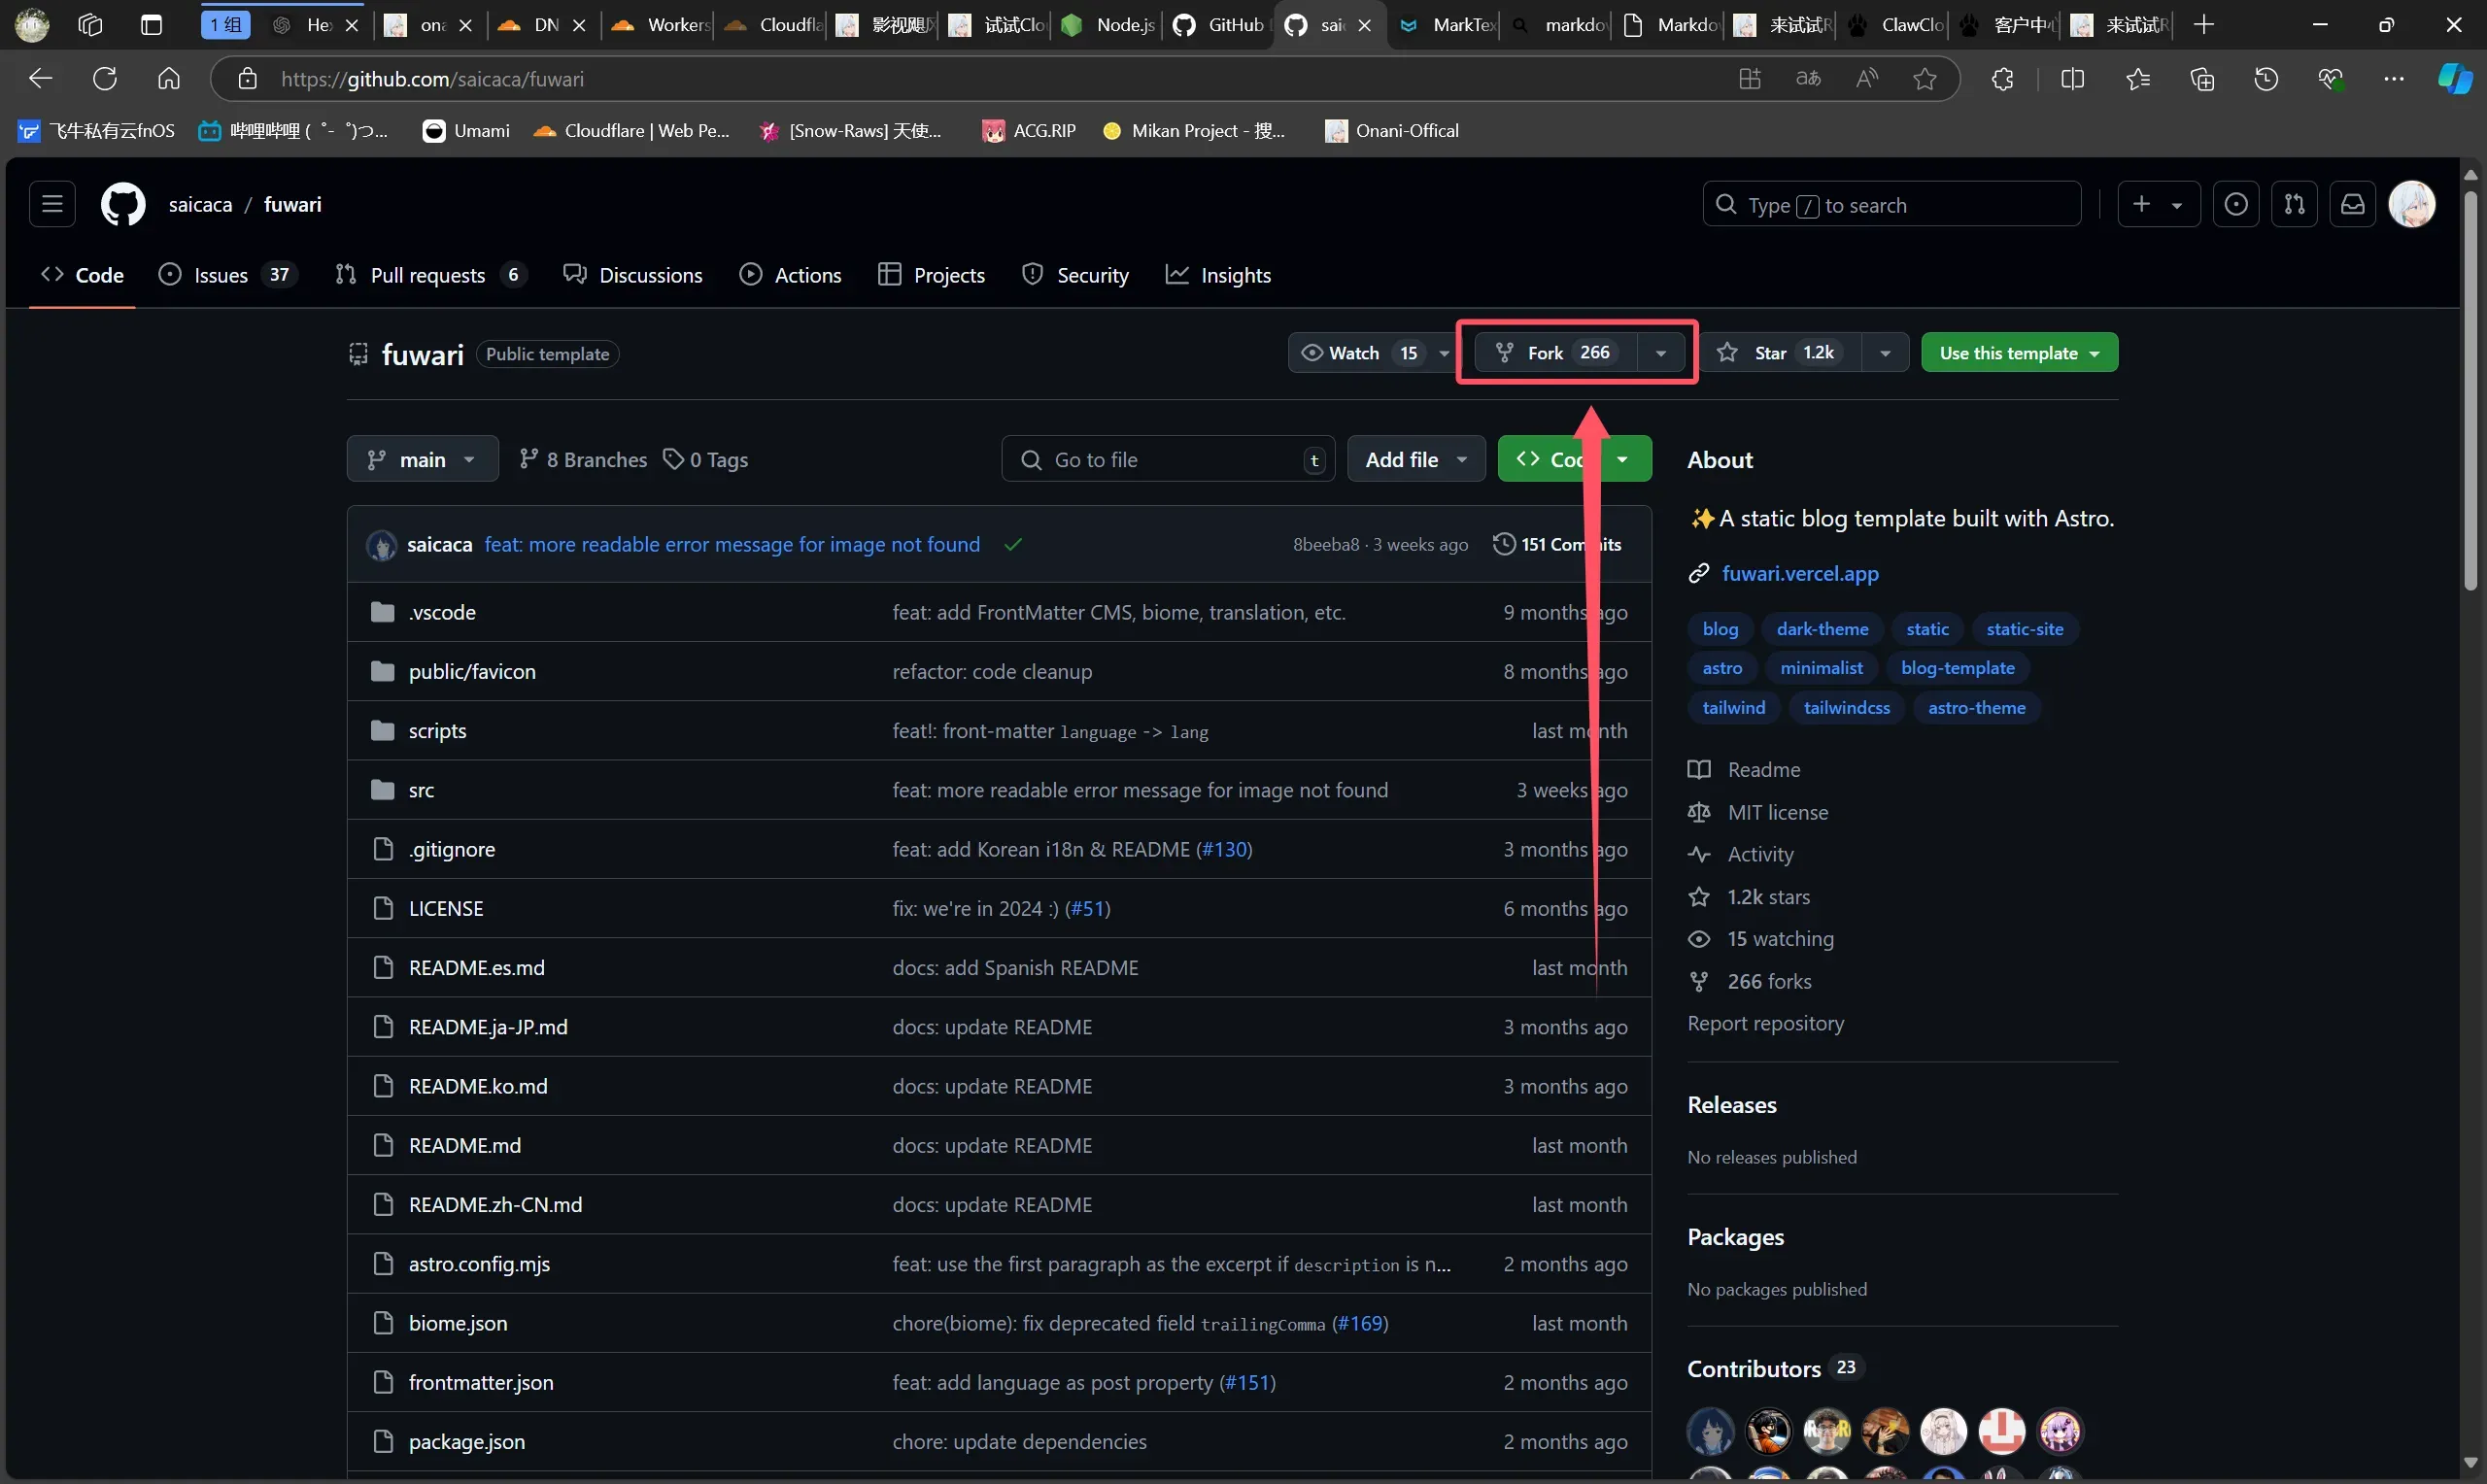
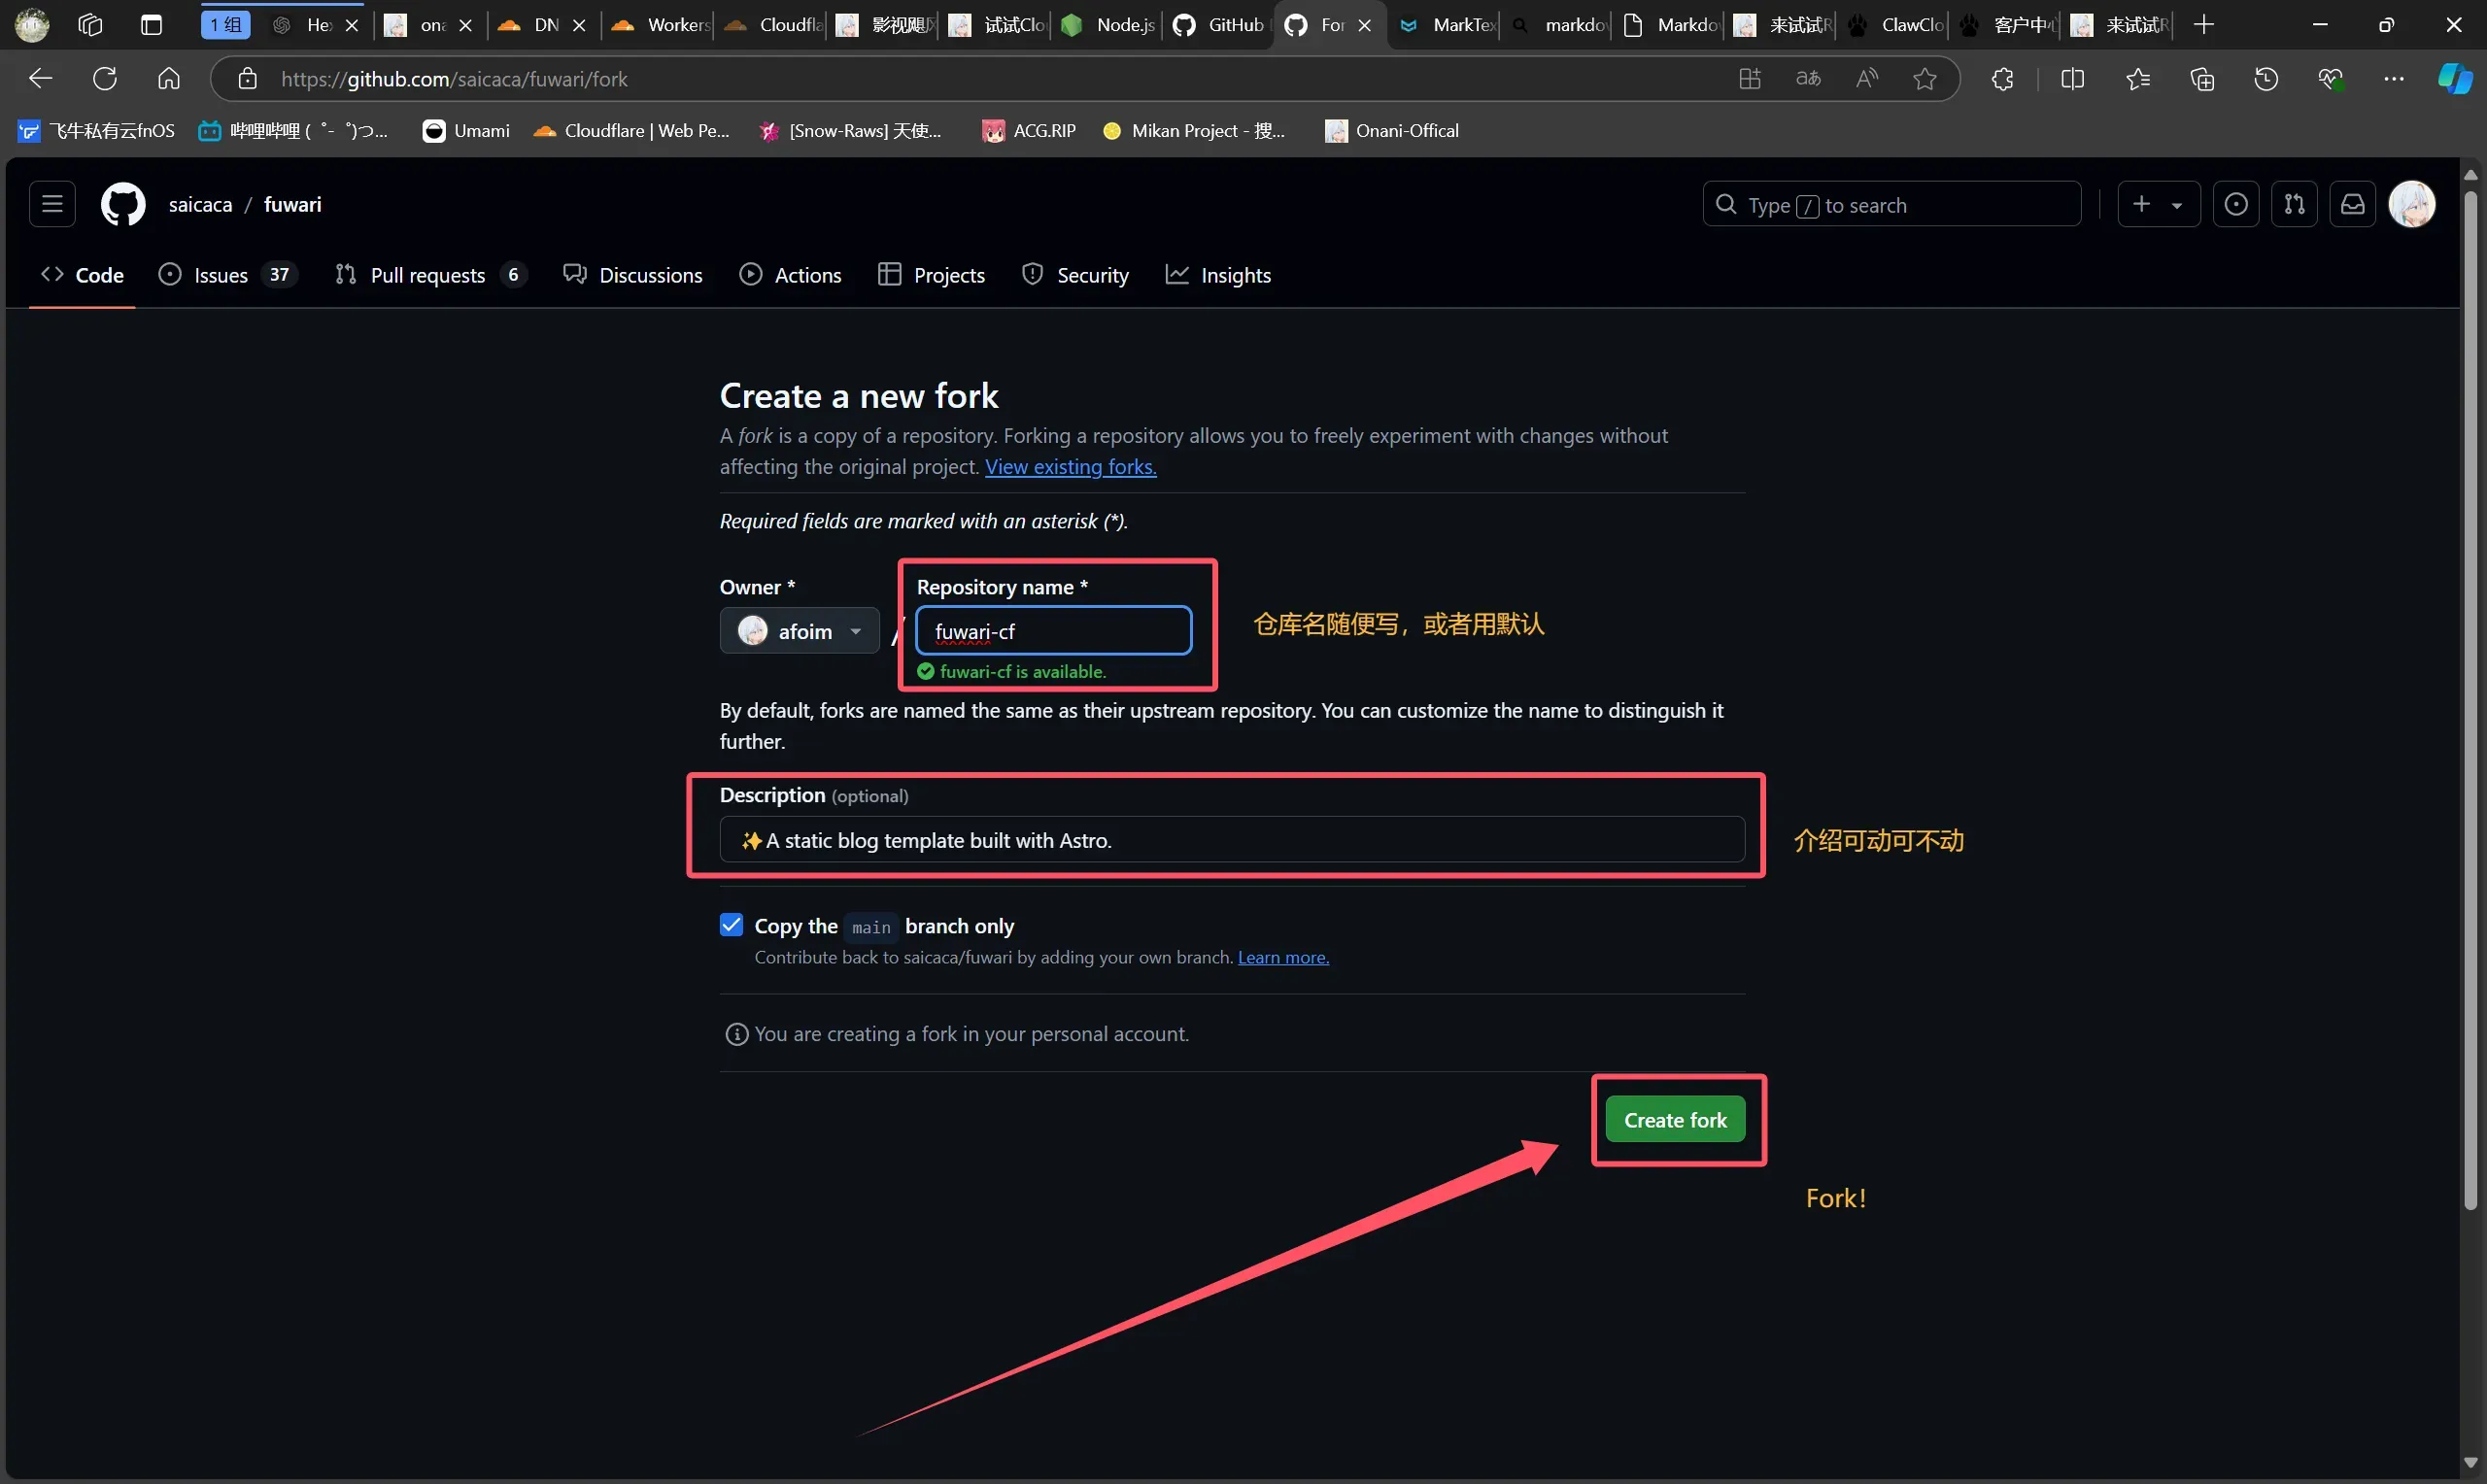
Fork仓库:
-
如果你不熟悉 Fork 仓库的流程,可以参考下面的图片教程。
-
-
然后将仓库克隆到本地:
git clone <你的仓库URL>。如果可以使用 SSH,后续推送通常会更方便。 -
先全局安装
pnpm:npm install -g pnpm。如果 npm 在国内下载较慢,可以尝试切换镜像源,例如 npmmirror 镜像站。 -
接着在项目根目录安装依赖:
pnpm install和pnpm add sharp。 -
完成以上步骤后,Fuwari 就已经成功部署到本地了。
你也可以使用创建一个新的空仓库然后手动上传文件,并且可以将仓库可见性设为:Private
改写Fuwari的基本信息并且清理多余文件
刚创建的 Fuwari 可能带有默认的博主名称、图标、链接、简介和示例文章。为了让站点更符合你的使用场景,建议先把这些内容改成自己的信息。
-
在根目录的
src文件夹中找到config.ts,这里是站点的核心配置文件。-
title:你的博客主标题
-
subtitle:你的博客副标题。可选,在首页会显示为“主标题 - 副标题”
-
-
lang:博客显示语言。注释里已经列出了一些常见值,例如
en、zh_CN、zh_TW、ja、ko -
themeColor:
hue表示博客主题色。你可以先在博客右上角的调色板里挑选喜欢的颜色,再把数值写回配置中。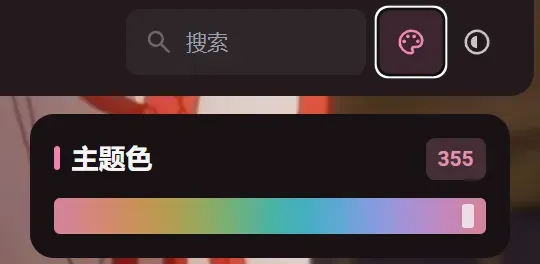
-
banner:src:即banner图片,支持http/https URL
-
favicon:src:即网站图标,支持http/https URL
-
links:即友情链接,这些链接在导航栏上
-
avatar:你的头像
-
name:你的名字
-
bio:个性签名,会显示在头像和名字下方
-
NavBarConfig用于配置导航栏链接,ProfileConfig用于配置个人资料区域的链接,效果如下图所示。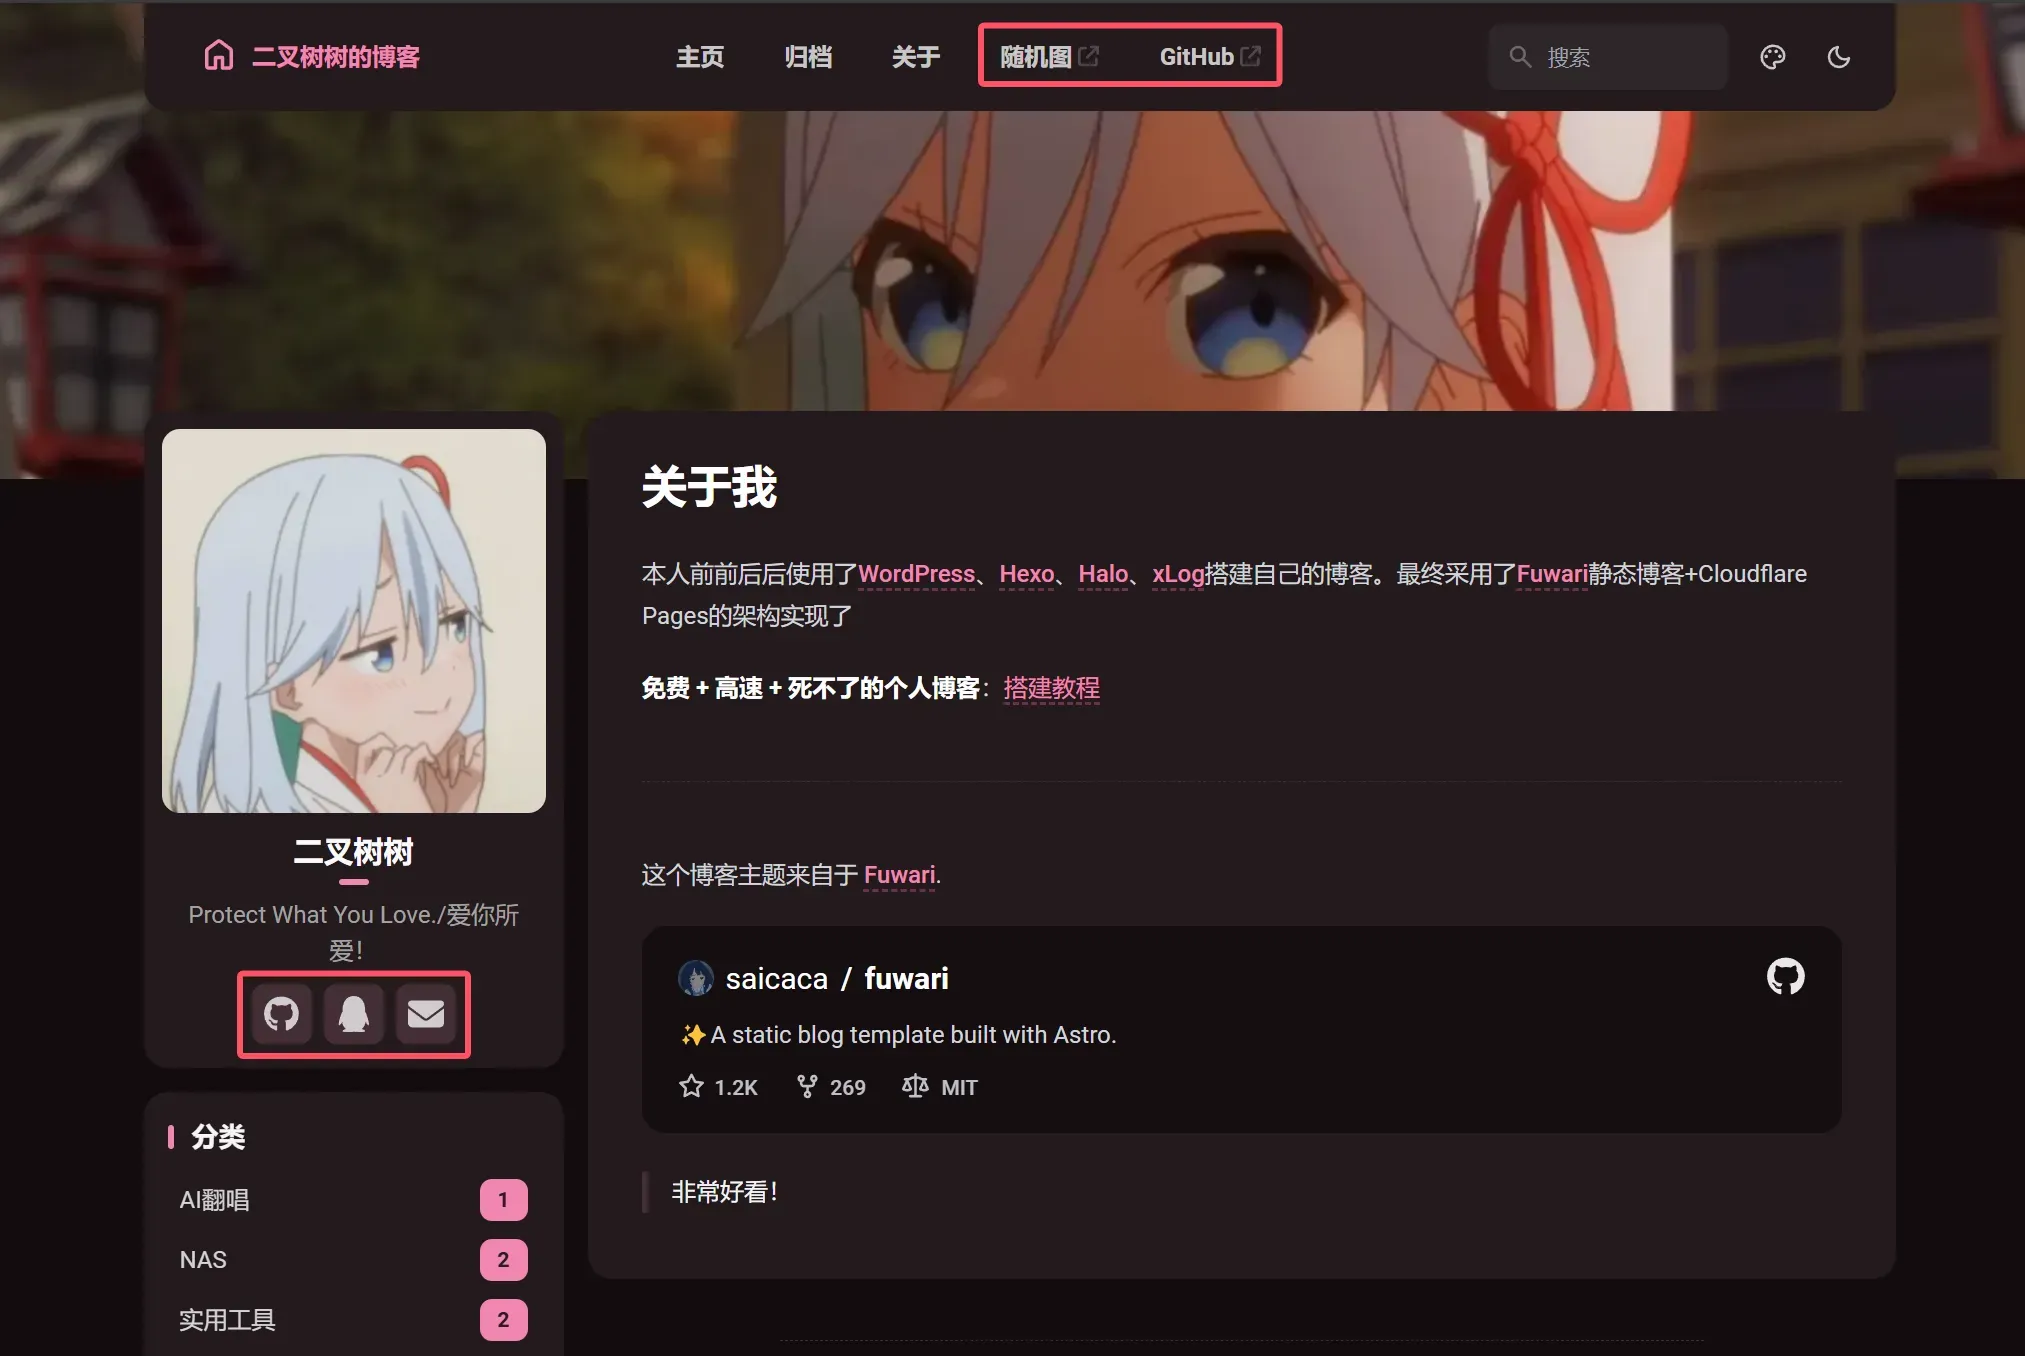
-
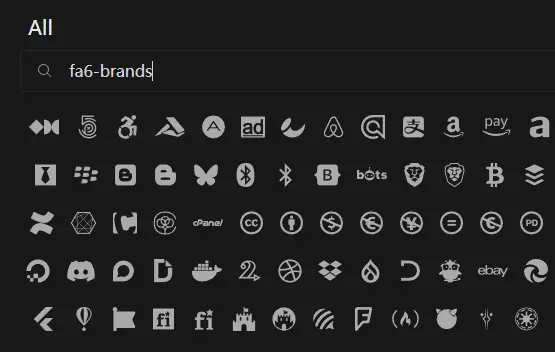
icon:你可以前往 icones.js 搜索想要的图标。例如 QQ 可以填写
fa6-brands:qq。Fuwari 默认支持fa6-brands、fa6-regular、fa6-solid、material-symbols等类型,必要时也可以在astro.config.mjs中继续扩展。 -
-

-
这里我附上我的
config.ts -
ts
import type {
  LicenseConfig,
  NavBarConfig,
  ProfileConfig,
  SiteConfig,
} from './types/config'
import { LinkPreset } from './types/config'

export const siteConfig: SiteConfig = {
  title: 'AcoFork Blog',
  subtitle: '爱你所爱!',
  lang: 'zh_CN',         // 'en', 'zh_CN', 'zh_TW', 'ja', 'ko'
  themeColor: {
    hue: 355,         // Default hue for the theme color, from 0 to 360. e.g. red: 0, teal: 200, cyan: 250, pink: 345
    fixed: false,     // Hide the theme color picker for visitors
  },
  banner: {
    enable: true,
    src: 'https://eo-r2.2x.nz/myblog/img/222.webp',   // Relative to the /src directory. Relative to the /public directory if it starts with '/'
    position: 'center',      // Equivalent to object-position, only supports 'top', 'center', 'bottom'. 'center' by default
    credit: {
      enable: false,         // Display the credit text of the banner image
      text: '',              // Credit text to be displayed
      url: ''                // (Optional) URL link to the original artwork or artist's page
    }
  },
  favicon: [    // Leave this array empty to use the default favicon
     {
       src: 'https://q2.qlogo.cn/headimg_dl?dst_uin=2973517380&spec=5',    // Path of the favicon, relative to the /public directory
       //theme: 'light',              // (Optional) Either 'light' or 'dark', set only if you have different favicons for light and dark mode
       sizes: '128x128',              // (Optional) Size of the favicon, set only if you have favicons of different sizes
     }
  ]
}

export const navBarConfig: NavBarConfig = {
  links: [
    LinkPreset.Home,
    LinkPreset.Archive,
    LinkPreset.About,
    {
      name: '随机图',
      url: 'https://pic.onani.cn',     // Internal links should not include the base path, as it is automatically added
      external: true,                               // Show an external link icon and will open in a new tab
    },
    {
      name: 'GitHub',
      url: 'https://github.com/saicaca/fuwari',     // Internal links should not include the base path, as it is automatically added
      external: true,                               // Show an external link icon and will open in a new tab
    },
  ],
}

export const profileConfig: ProfileConfig = {
  avatar: 'https://eo-r2.2x.nz/myblog/img/111.webp',  // Relative to the /src directory. Relative to the /public directory if it starts with '/'
  name: '二叉树树',
  bio: 'Protect What You Love./爱你所爱!',
  links: [
    // {
      // name: 'Twitter',
      // icon: 'fa6-brands:twitter',       // Visit https://icones.js.org/ for icon codes
                                        // You will need to install the corresponding icon set if it's not already included
                                        // `pnpm add @iconify-json/<icon-set-name>`
      // url: 'https://twitter.com',
    // },
    // {
      // name: 'Steam',
      // icon: 'fa6-brands:steam',
      // url: 'https://store.steampowered.com',
    // },
    {
      name: 'GitHub',
      icon: 'fa6-brands:github',
      url: 'https://github.com/afoim',
    },
    {
      name: 'QQ',
      icon: 'fa6-brands:qq',
      url: 'https://qm.qq.com/q/Uy9kmDXHYO',
    },
    {
      name: 'Email',
      icon: 'fa6-solid:envelope',
      url: 'mailto:[email protected]',
    },
  ],
}

export const licenseConfig: LicenseConfig = {
  enable: true,
  name: 'CC BY-NC-SA 4.0',
  url: 'https://creativecommons.org/licenses/by-nc-sa/4.0/',
}
-
清理多余文件。根目录下的
src/content/posts文件夹里会带有一些示例文章,这些内容主要用于演示 Markdown 语法和 Fuwari 的基本用法。你可以先备份到别处,再按需删除。 -
完成这些设置后,就可以开始撰写自己的文章了。
让我们开始写作!
推荐使用 黑曜石(Obsidian)
-
首先,在项目根目录执行:
pnpm new-post <这里填写你的文章标题> -
然后,在根目录下的
src/content/posts文件夹中会多出一个xxx.md文件 -
用 MarkText 打开这个文件后,你会看到一组基础元数据,其中有几项最需要关注。
-
markdown
title: xxx published: 2024-10-14 description: '' image: '' tags: [] categories: '' draft: false lang: ''-
title:文章标题
-
published:文章创建时间
-
description:文章描述,正常会显示在文章标题下面
-
image:文章封面图(同目录需要写
./如:./https://eo-r2.2x.nz/myblog/img/2024-10-14-11-33-28-image.webp) -
tag:文章标签
-
categories:文章分类
-
-
还需要修改根目录下的
astro.config.mjs,把其中的site:改成你自己的站点 URL,例如:site: "https://onani.cn",。 -
如果你想在 Markdown 文章里方便地插入图片,也可以顺手把编辑器配置好。
-
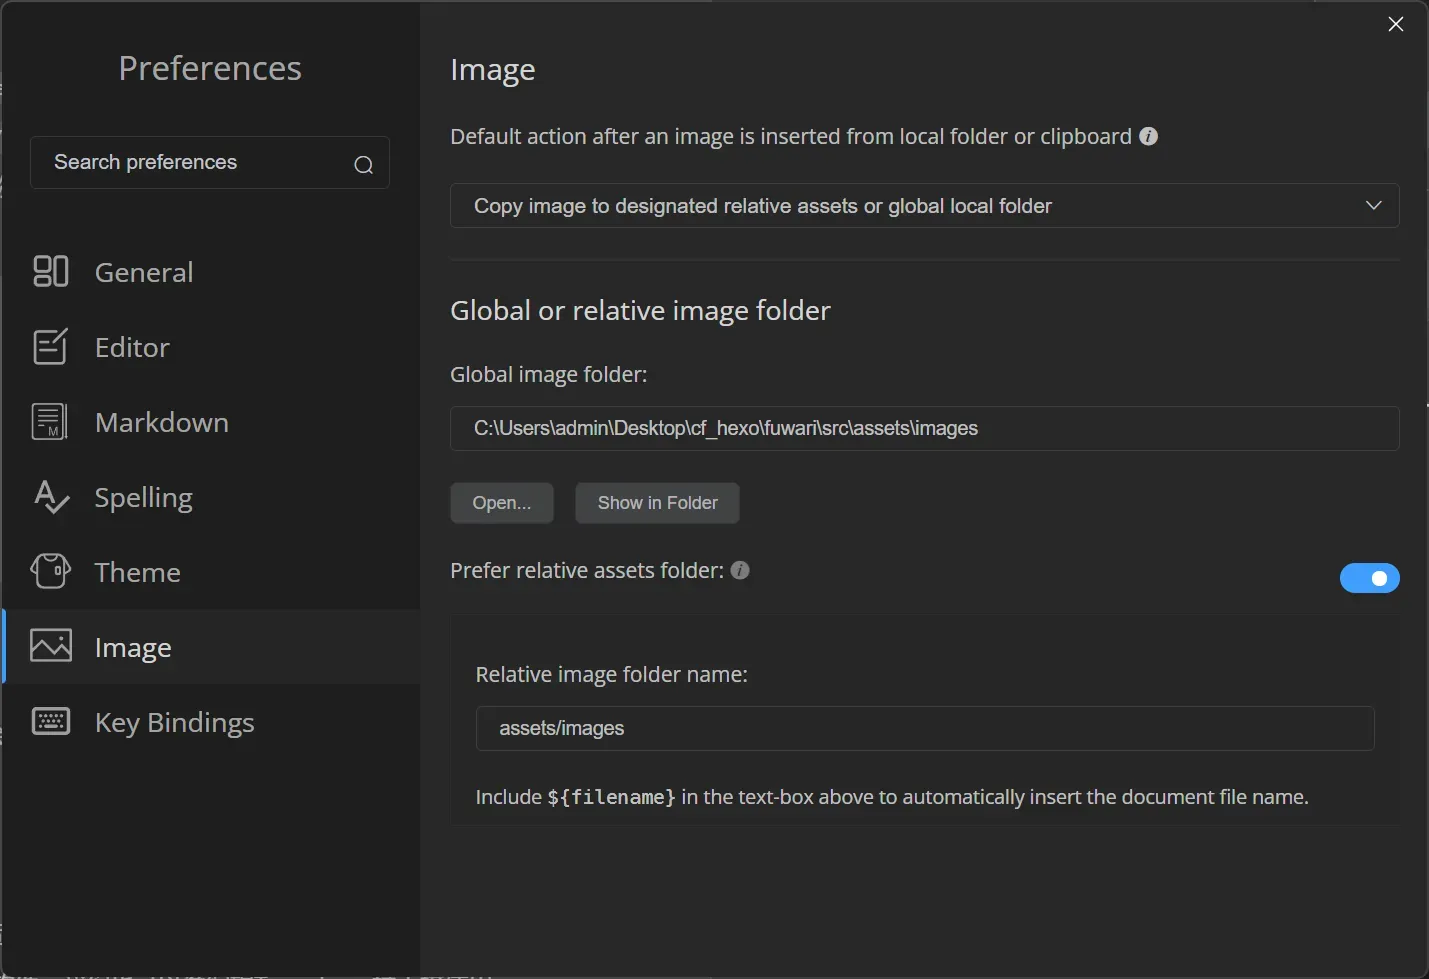
这并不复杂。借助 MarkText,可以像使用传统博客编辑器一样直接复制粘贴图片,不过需要先做一点简单配置:
-
依次点击 MarkText 左上角菜单 ->
File->Preferences-> 左侧Image分类,然后按照下图进行设置。注意把第一个选项改成以Copy开头的模式,开启Prefer开关,并在上下两个文本框中分别填写绝对路径和相对路径。 -
-
这样一来,插入图片时就会先把图片复制到
https://eo-r2.2x.nz/myblog/img对应的位置,再自动以这样的格式写入 Markdown 文件。你只需要复制粘贴,剩下的步骤 MarkText 会自动完成。
- 配置完成后,你就可以比较高效地用 MarkText 编写 Markdown 博文了。
本地预览,然后发布到Github
-
当你觉得文章写得差不多时,可以在项目根目录执行:
pnpm dev。稍等片刻后,就能在本地预览博客效果。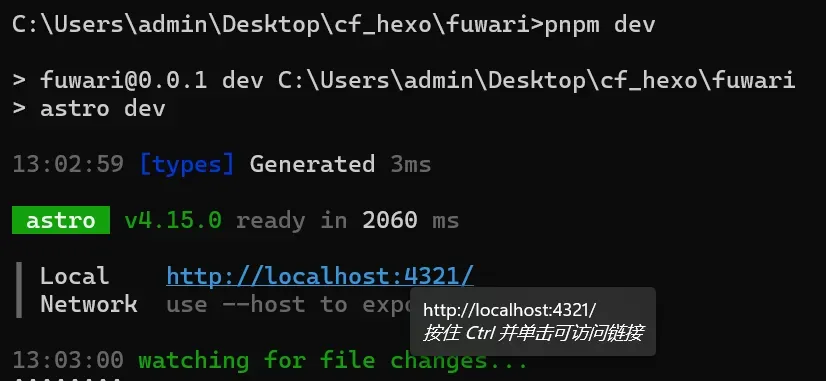
-
接下来就可以使用 Git 把这些改动发布到 GitHub。
-
首先,让 Git 知道你是谁:
git config --global user.name "你的GitHub用户名"和git config --global user.email "你的GitHub邮箱@example.com" -
然后,将远程仓库地址改成 SSH 形式(如果你本来就是通过 SSH 克隆的,就不需要再修改):
git remote set-url origin [email protected]:xxx/xxx -
随后,提交所有变更:
git add . -
接着,创建一次本地提交:
git commit -m "项目初始化" -
最后,把本地更改推送到远程仓库:
git push
- 完成后,你的 GitHub 仓库里就应该能看到新的提交记录了。

让Cloudflare连接上Github,使用Pages服务展示你的博客(FREE!)
-
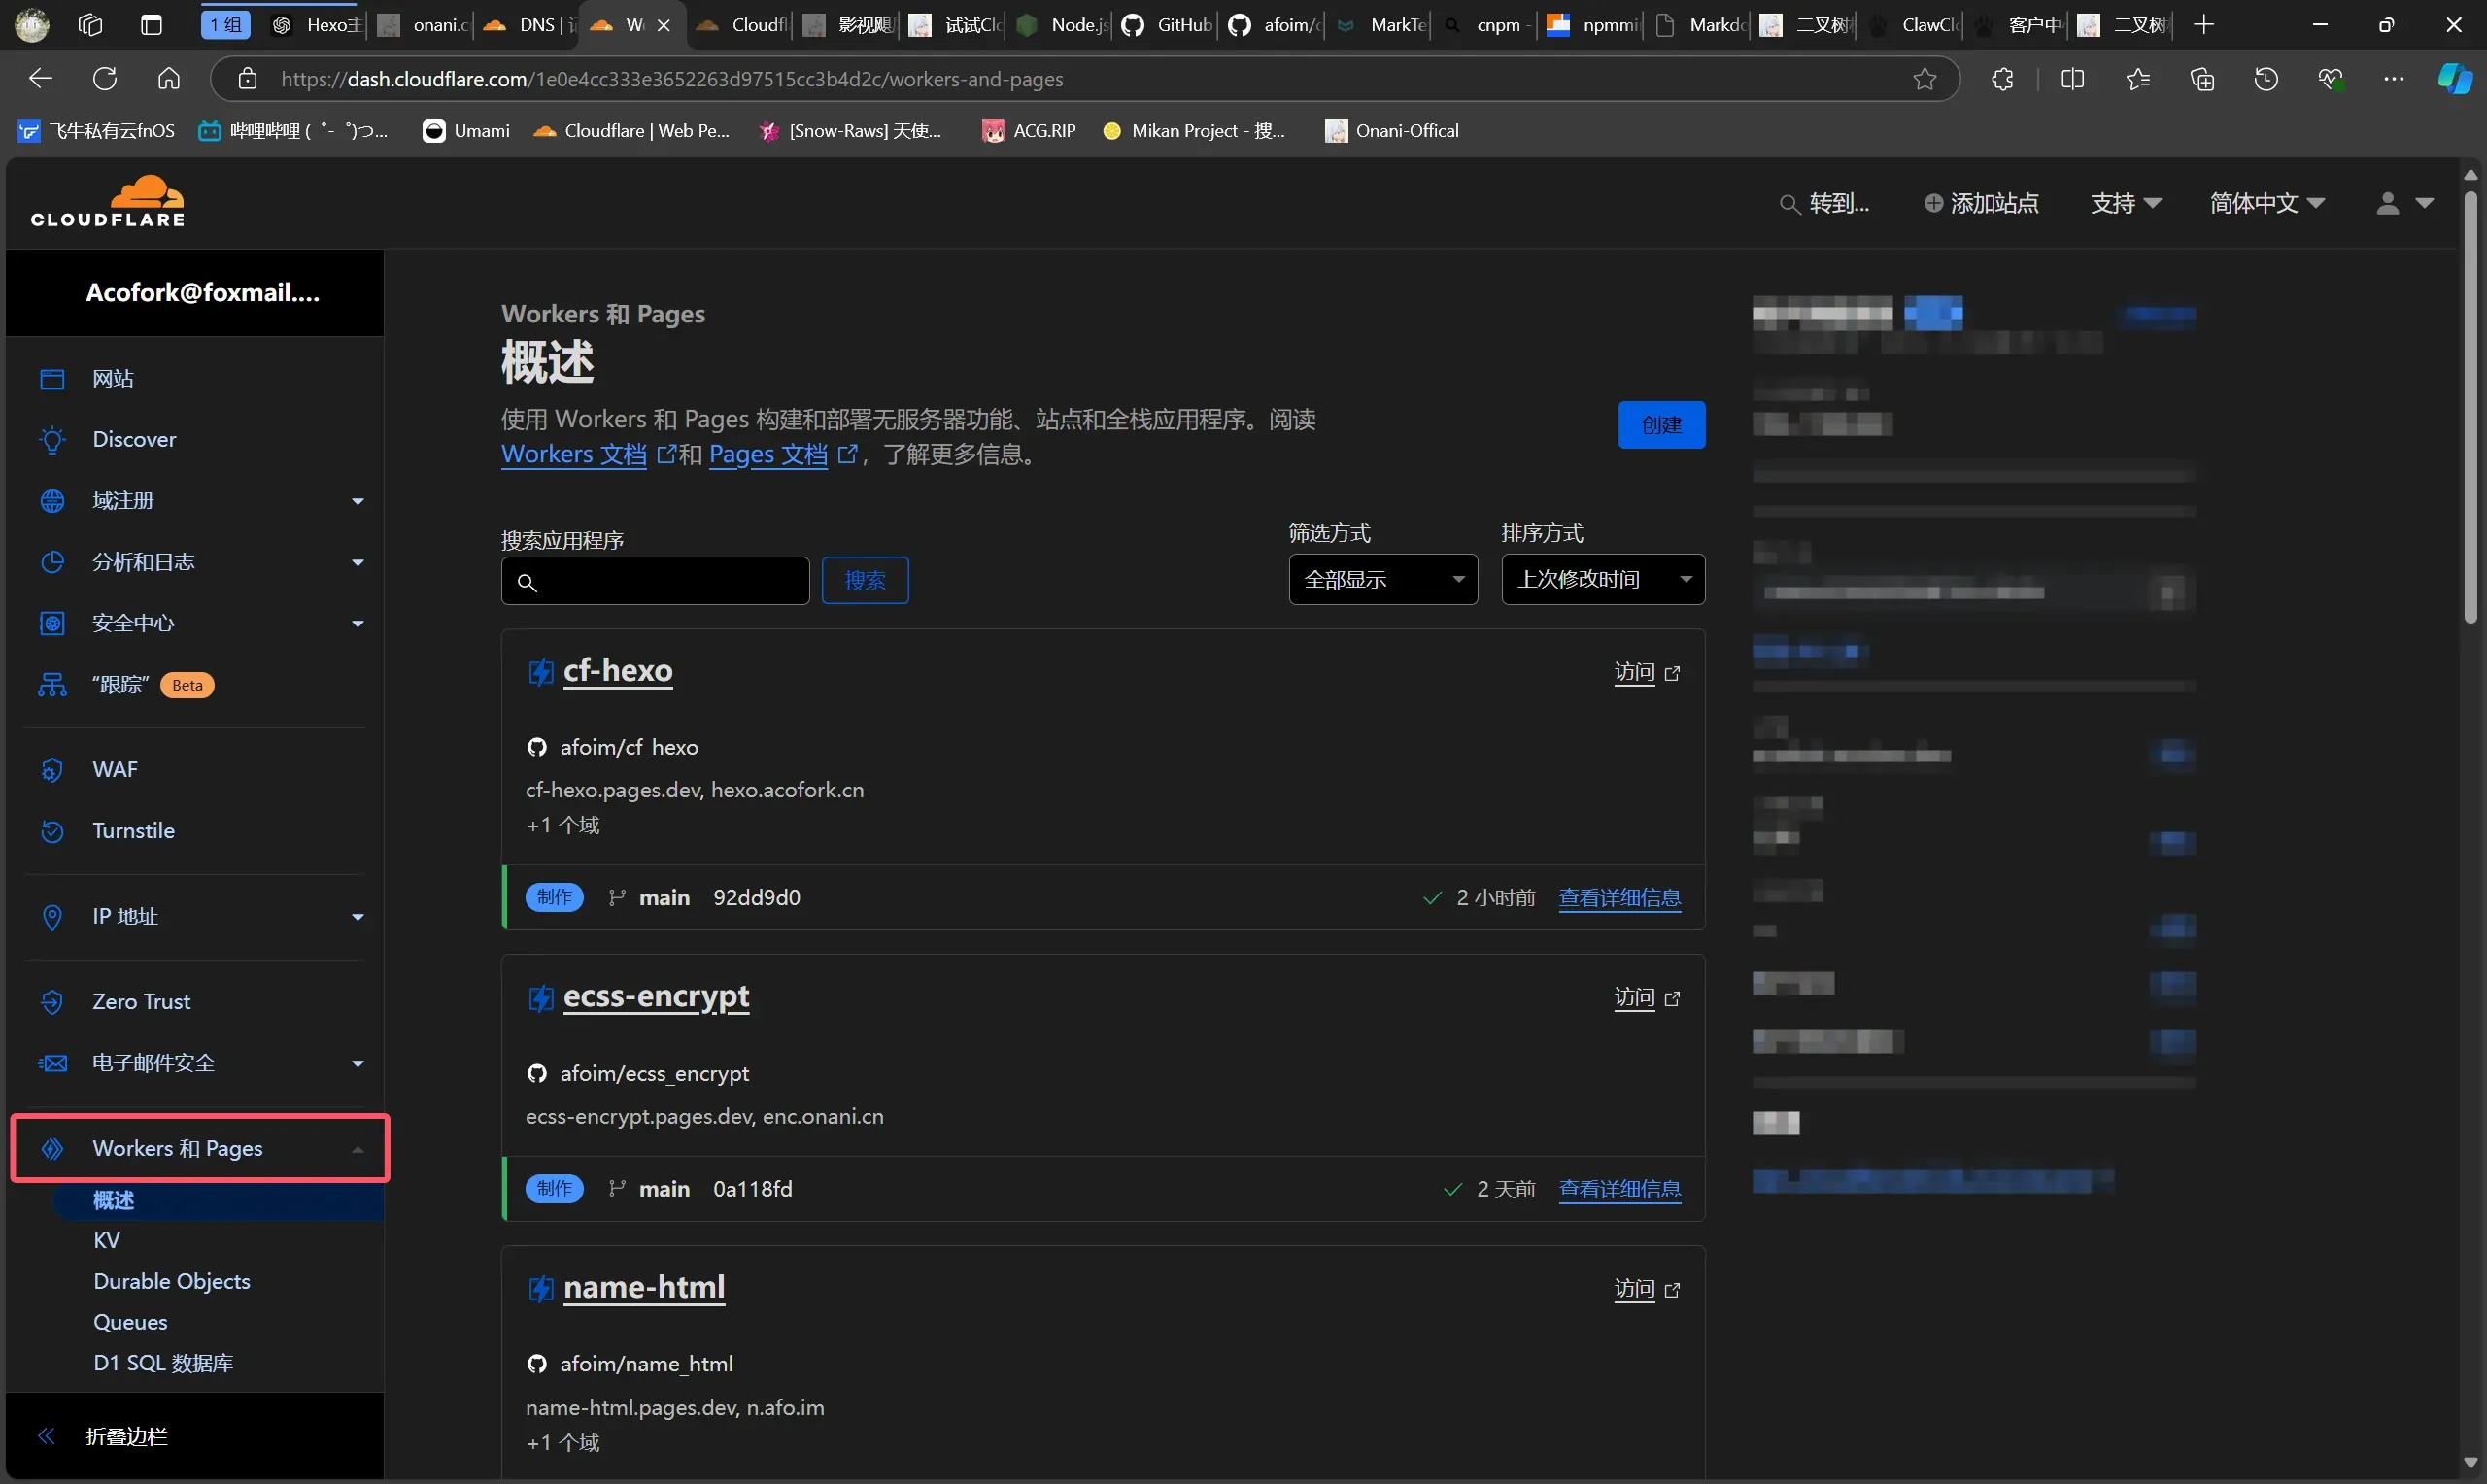
前往Cloudflare的 Workers 和 Pages 页面,创建一个新Pages
-
然后选择连接Git存储库,连接你的Github,随后设置构建命令:
pnpm build,然后设置构建输出目录:dist,如图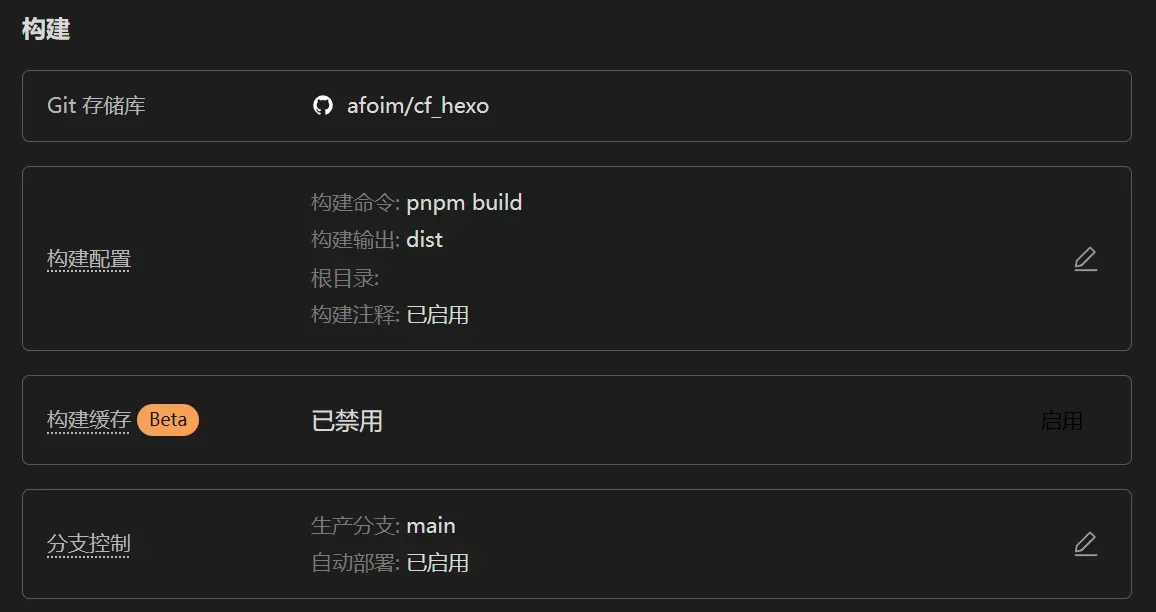
-
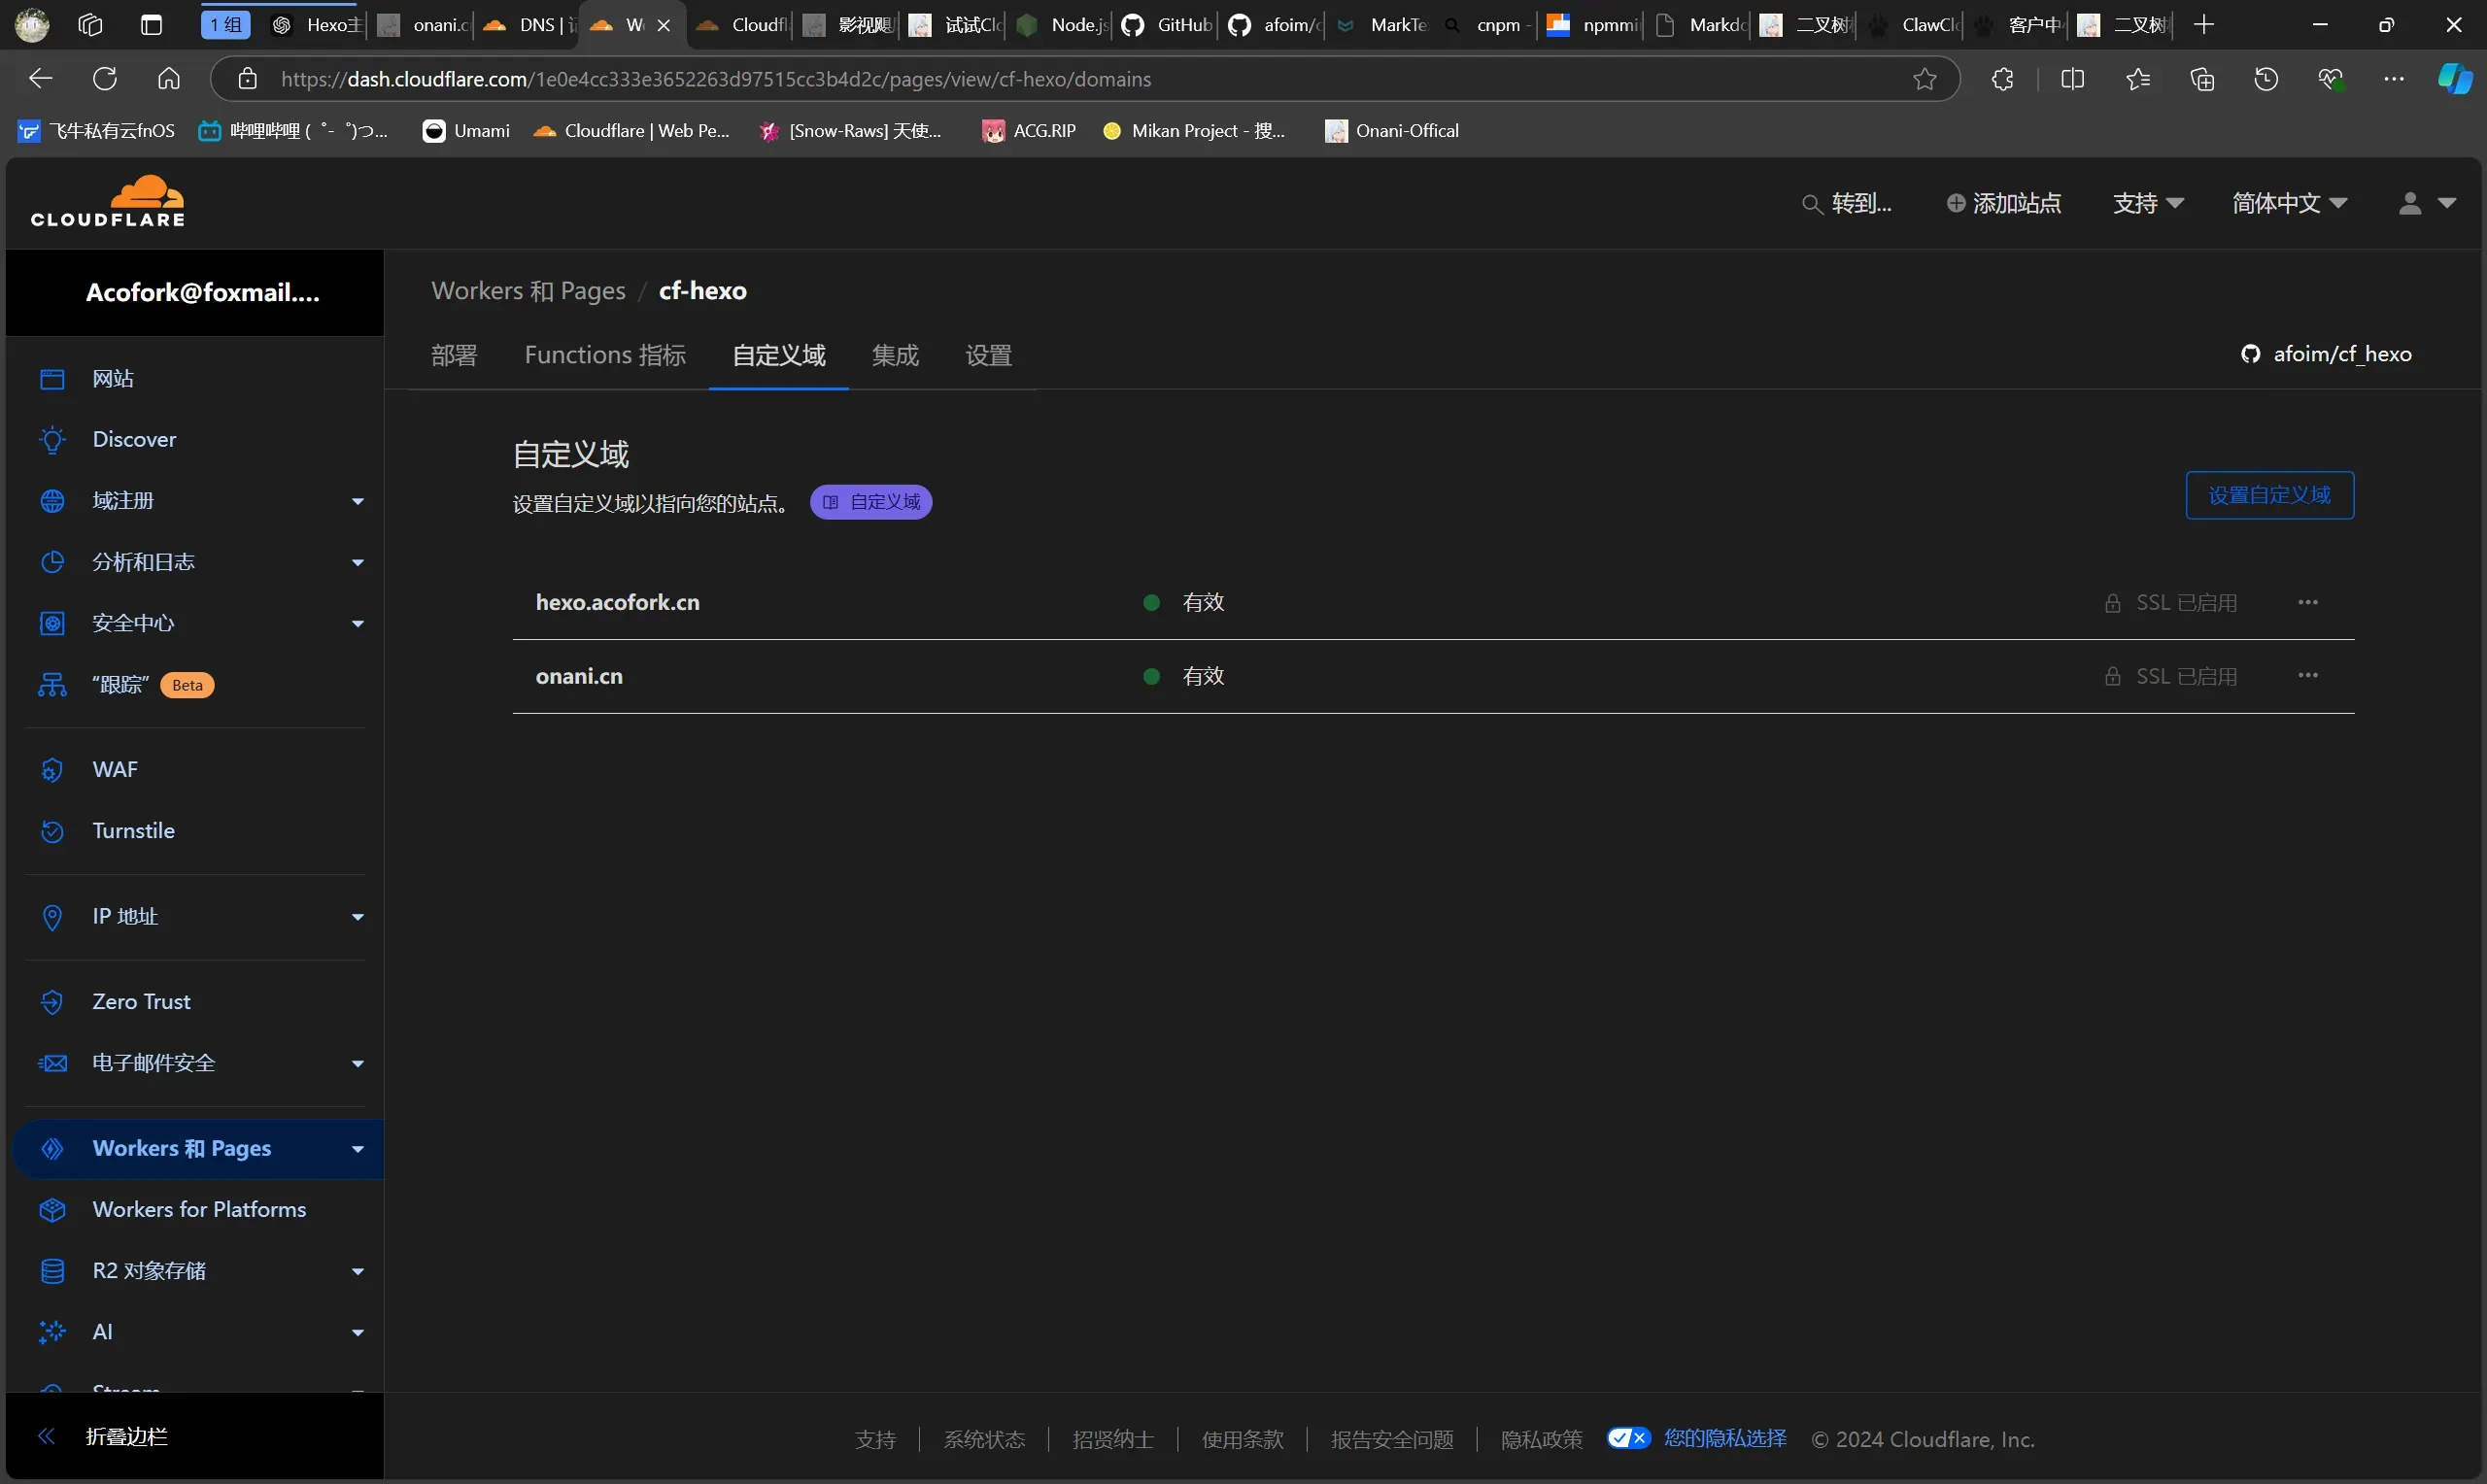
绑定自定义域,访问自定义域即可访问你的博客!
-
随后,你只需要在本地编写文章,然后使用Git将更改推送到远程仓库,Cloudflare就会自动部署,更新你的博客!
评论功能需要启用功能性 Cookie
请在 Cookie 设置 中启用